Path Tracer
The path tracer is Paintapp's high-fidelity 3D renderer. Where the real-time preview is built for speed, the path tracer is built for accuracy: it simulates how light actually travels through a scene — bouncing off surfaces, passing through glass, and scattering into shadows — to produce images with true reflections, refraction, soft shadows, and global illumination. It runs entirely on your GPU, in the browser.
What makes it different
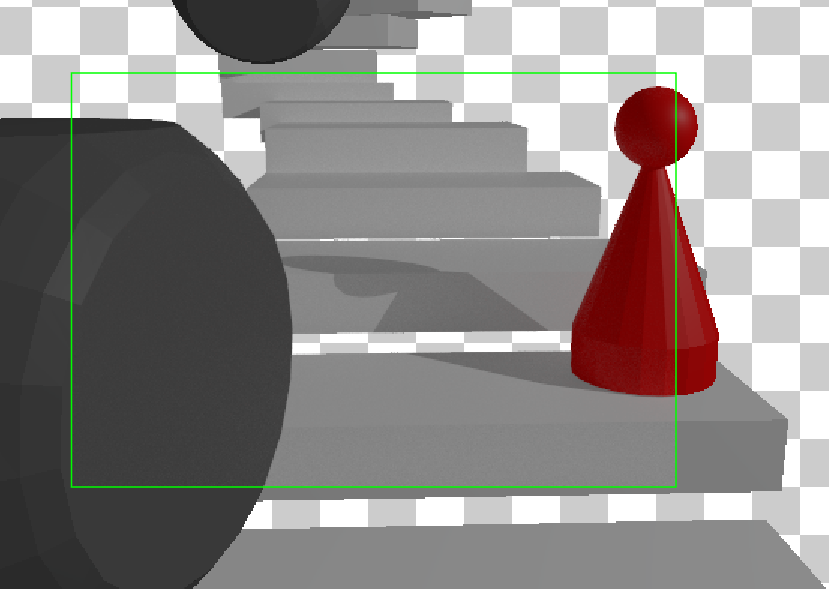
A rasterizer shades each surface on its own and cannot easily see the rest of the scene. A path tracer traces rays of light and lets them bounce, so surfaces influence each other: a red wall tints the floor beside it, a chrome sphere reflects its surroundings, and a glass object bends and colors what is behind it. This is the same family of technique used by offline film renderers.
What it produces
- Accurate shadows Contact-tight, physically soft shadows cast by the actual geometry — not available in the real-time preview.
- Reflections Mirror and glossy reflections that show the rest of the scene, driven by each material's roughness.
- Refraction & glass Light bends through transmissive materials by their index of refraction, and is tinted as it passes through.
- Global illumination Indirect light bounces between surfaces, so color and brightness spread naturally through the scene.
- Colored, translucent shadows Glass and partly-transparent surfaces cast tinted shadows instead of solid black.
- Emissive surfaces Materials that glow act as real light sources, casting light and soft shadows onto everything around them — and the tracer samples them directly, so glowing surfaces light the scene cleanly instead of taking many passes to emerge from noise.
- Fabric & sheen Materials with a sheen layer — velvet, satin, brushed cloth — pick up the soft grazing-angle glow real fabric has.
Turning it on
Path tracing is enabled per view. The viewer exposes a Path Tracing toggle and a path-trace rectangle — the region of the canvas the tracer works on. Rather than re-rendering the whole document at once, the tracer refines the chosen rectangle, so you can focus quality where you need it and keep the rest of the interface responsive.
Once enabled, the traced image appears as a live preview overlaid on your 3D scene and refines progressively — it starts noisy and cleans up as more light samples accumulate. You can keep editing while it converges; moving an object or the camera restarts the refinement automatically.
The convergence gauge
The border of the path-trace rectangle doubles as a progress gauge. It fills from yellow toward green as samples accumulate, and turns fully green when the render has reached its sample target and is fully converged. It is an at-a-glance way to know whether the image is still cleaning up or is finished.
Quality settings
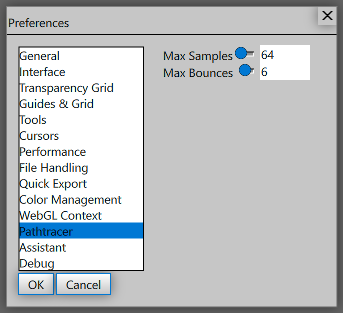
A handful of settings control the quality-versus-speed trade-off. They live under Preferences → Pathtracer and take effect immediately — changing any of them restarts the refinement. The first two set how far the render goes; the rest tune noise, speed, and responsiveness. You can leave them all at their defaults and get a good picture.
| Setting | Default | Range | What it does |
|---|---|---|---|
| Max Samples | 64 | 8–1024 | How many light samples per pixel accumulate before the image is considered converged. Each sample refines the picture and removes noise. Raise it for cleaner, grain-free results (slower to finish); lower it for a quicker, noisier preview. This value also drives the convergence gauge. |
| Max Bounces | 6 | 1–16 | How many times a ray of light is allowed to bounce before the tracer stops following it. More bounces mean richer global illumination and more accurate multi-surface reflections and refractions (light passing through several panes of glass, deep interior lighting), at the cost of speed. Fewer bounces render faster but flatten indirect lighting. |
| Min Bounces | 3 | 0–8 | How many bounces a ray is followed before the tracer may cut a dim path short early (a statistical technique that saves work on rays contributing little). Higher values reduce noise in dark, indirectly-lit areas — interiors, deep shadow — but cost speed. Keep it below Max Bounces. |
| Clamp Indirect | 3 | 0–20 | Caps how bright any single bounced (indirect) light sample is allowed to be. This is the standard cure for lone white speckles — fireflies — that appear around glass and shiny surfaces. Lower is cleaner but slightly dims very strong indirect light; set it to 0 to disable the cap for a fully physically-accurate (but noisier) result. |
| GPU Budget (ms) | 8 | 2–32 | How much time each frame the tracer is allowed to spend on your GPU. Higher converges faster but leaves the app less responsive while it works; lower keeps painting and panning smooth at the cost of a slower render. This is purely a speed/responsiveness dial — it does not change the final image. |
| Caustics | On | On / Off | Whether to trace light that focuses through glass or bounces off mirrors onto other surfaces — the bright patterns cast by a magnifying glass or a glass of water. These are beautiful but slow to clean up. Turning caustics off converges much faster and quieter around glass and chrome, at the cost of losing those focused-light patterns. |
Materials and lights
The path tracer reads the same scene as the preview, so your materials and lights carry over. It honors each material's base color (and texture), metallic and roughness values, emissive glow, an optional sheen layer for cloth-like surfaces, and — for glass and liquids — the index of refraction and absorption that give transmissive surfaces their bend and tint. Rich materials imported from MaterialX carry their full surface definition through to the tracer — see the MaterialX page for how its node graphs map onto the tracer's single shader. It lights the scene from your stage lights plus ambient and a sky-gradient environment, so rays that escape the scene pick up sky color.
Because the tracer computes real occlusion and bounced light, a path-traced surface can legitimately look different from the preview — most visibly, it will be darker where geometry actually casts a shadow or blocks indirect light. That difference is the point, not a defect.
How it works
This section is optional background for the curious — you do not need it to use the feature.
- GPU ray tracing. The tracer runs as a WebGL 2 GPU program. To find what each ray hits quickly, the scene is organized into a bounding-volume hierarchy (a spatial acceleration structure built with the surface-area heuristic), so even scenes with hundreds of thousands of triangles trace efficiently.
- Progressive, tiled accumulation. The image is rendered in tiles across successive frames and the samples are averaged together over time. This is why the picture starts rough and sharpens up, and why it stays interactive while it works.
- Smart updates while you edit. When you nudge an object or orbit the camera, the tracer updates only what changed instead of rebuilding everything — a moved object refits the scene structure rather than rebuilding it from scratch — so interaction stays fast. Panning the view reuses the light already gathered where it can, instead of starting from black.
- Tone mapping & color management. Light is accumulated in high-dynamic-range, scene-linear color, then tone-mapped and converted into your document's color space through Paintapp's ICC / OpenColorIO pipeline for display — the same path used by the rest of the app, so the traced result matches your color setup.